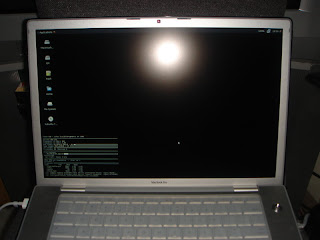
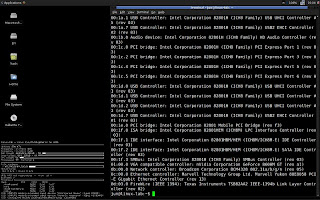
 I couldn’t stop the urge to install Linux on my new Macbook Pro. I know I said on one of my recent posts that I will have to wait for the release of Ubuntu 8.04 “Hardy Heron” before I’ll take the plunge. However, I changed my mind and decided to install Xubuntu 7.10 “Gutsy Gibbon” instead.
Since I couldn’t find a tutorial on the web on installing Xubuntu/Ubuntu on the 4th Generation Macbook Pro with Penryn processor, I decided to share to you how I put the somewhat “geeky” Xubuntu on my “beautiful” Mac.
Here is the step-by-step guide:
Partitioning Using Boot Camp:
(I assumed that Mac OS X Leopard is already pre-installed)
1. Inside Mac OS X Leopard, click on Finder -> Applications -> Utilities -> Boot Camp Assistant.
2. When resizing the disk, just remember that the Windows partition will be allocated to Linux later on. The partitioning is very easy using Boot Camp Assistant so I don’t need explain further.
Installing rEFIt (a boot menu and maintenance toolkit for Intel Macs):
1. Inside Mac OS X Leopard, download the latest version of rEFIt (Mac disk image) which can be found HERE.
2. Mount or open rEFIt.dmg disk image.
3. Double-click on the “rEFIt.mpkg” package.
4. Follow the instructions and select your Mac OS X installation volume as the destination volume for the install.
5. Restart your Mac. You will see the rEFIt boot menu if the installation is successful.
Installing Xubuntu:
(Note that Wireless internet connection is not yet configured inside Xubuntu, it is advisable to establish link using the hard line or the Ethernet port before starting the installation.)
1. Restart the computer with Xubuntu 7.10 Live CD inserted. rEFIT should recognize it and give you option to "boot Linux from CD". Scroll to this option using the arrow keys.
2. Once inside Xubuntu desktop, click on 'Install' icon.
3. Select the appropriate language, select 'Keyboard Layout' as 'Macintosh', select 'Manual' partitioning, then 'Forward'.
4. Boot Camp will have created '/dev/sda3' which should be roughly the size of the partition you created. Select 'dev/sda3' and delete it by clicking 'Delete Partition'. This should now be 'free space'.
5. Select the 'free space' and click 'New Partition'. Set the size to approximately 1 GB less than the total amount of free space. Format it as an 'ext3' type partition and set the 'Mount Point' to '/'. Set the formatting to occur at the beginning. Click OK.
6. This should leave approximately 1 GB of free space. Select this free space and click 'New Partition'. Format it as a 'swap' type partition. Set the formatting to occur at the beginning. Click OK.
7. Now click 'Forward'. After being prompted for a user and computer name, check to make sure that the formatting is occurring at partitions #3 and #4 and click 'Install'.
8. Let the installation finish. Remove the Xubuntu CD and restart.
9. You will now be able to boot on the newly installed Xubuntu 7.10.
10. After the first reboot, you will be prompted to install the proprietary NVIDIA graphics driver. Install it and you are done.

You might think that the installation is done, but not really. I have listed here some key hardware components that are not working out-of-the-box:
* Wireless networking
* Sound/Audio
* Backlight, keyboard light and hotkeys
* Apple InfraRed
So, what’s working out-of-the-box?
* Keyboard
* USB
* NVIDIA graphics
* Ethernet networking
* TrackPad is working but with limited capability.
What’s yet to be tested?
* Bluetooth
* FireWire
* iSight

I’ll update this post as soon as I find ways to get these important Macbook Pro (Penryn) hardware mechanisms to work on Xubuntu.
UPDATE:
I made a review of Hardy Heron on Macbook Pro (Penryn) HERE.
UPDATE:
I made a review of Hardy Heron on Macbook Pro (Penryn) HERE.

why Xubuntu? The pro has plenty of power.
ReplyDeleteThanks for the comment. Why Xubuntu? I'm always running virtualization software like VMWare Server inside Linux so I needed a lighter and ultra-fast distro like Xubuntu.
ReplyDeletecan you tell us more about battery life using linux ?
ReplyDeletecould you run "powertop" and see your minimum power drain rate ?
ty
Battery life in Linux is almost the same as that when using OS X. When mostly doing heavy tasks, I get around 3 hours max in both systems.
ReplyDeletedid xubuntu can play games and movies??BY: valks
ReplyDelete